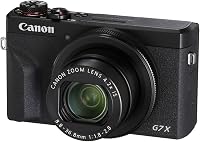
How to Use a DSLR Camera for the First Time
To use a DSLR camera, insert a charged battery and SD card, choose a shooting mode, focus on your subject, and press the shutter button. Start in Auto or Program mode, then practice aperture, shutter speed, and ISO one at a time.
On this page (9 sections)
- How do you use a DSLR camera for the first time?
- How should you hold and frame a DSLR?
- How do focus and autofocus work on a DSLR?
- What do aperture, shutter speed, and ISO do?
- Which lens should you use first?
- What should you know about memory cards and photo storage?
- How do you care for a DSLR camera and lens?
- What should you practice after your first DSLR photos?
- How do you use a DSLR camera with confidence?
To use a DSLR camera, insert a charged battery and SD card, choose a shooting mode, focus on your subject, and press the shutter button. Begin with Auto or Program mode, then learn aperture, shutter speed, and ISO through simple practice.
A DSLR can feel unfamiliar because it has more buttons and controls than a phone. You can still make a first photo quickly, then change one setting at a time as you learn what each control does.
How do you use a DSLR camera for the first time?
Charge the battery, insert a compatible memory card, attach the lens, and turn the camera on. Choose Auto mode, frame a nearby subject, half-press the shutter to focus, and press it fully to take a photo.
Before attaching or removing a lens, switch the camera off and follow its manual. Keep the lens cap on when you're not taking photos, and avoid touching the glass or the sensor inside the camera.
Take a few pictures in different kinds of light. Review them on the camera screen and notice whether the subject is sharp, too dark, or too bright.
Is Auto mode a good place to start?
Yes, Auto mode lets you practice framing and focusing before adjusting exposure settings. The camera chooses settings for the scene, so your first task is to keep the subject in focus and decide what belongs in the frame.
If your camera has Program mode, try it after Auto. Program mode can let you adjust some settings while the camera still chooses an exposure, though available controls vary by camera.
A beginner option such as the Canon EOS Rebel T7 Kit includes an optical viewfinder with about 95% viewing coverage and a 9-point autofocus system. Check the best DSLR for beginners guide if you're still choosing a camera.
How should you hold and frame a DSLR?
Hold the camera with both hands, keep your elbows close to your body, and look through the viewfinder or at the screen. Place your subject where you want it in the frame before pressing the shutter.
Rest the lens in your left hand and use your right hand for the grip and shutter button. A steady stance helps reduce camera movement, especially when light is low.
Look around the edges of the frame for distracting objects. Try moving a step to one side or changing the camera angle before taking another photo.
When should you use the viewfinder or screen?
Use the viewfinder when you want to hold the camera close to your face, and use the screen when it makes framing easier. Your camera's screen, viewfinder, and controls may work differently depending on the model.
An optical viewfinder shows the scene through the camera's lens system. The image in the viewfinder may not show every edge of the final frame, so review your photo when framing precisely matters.
How do focus and autofocus work on a DSLR?
Autofocus adjusts the lens to bring a subject into focus; choose a focus point over the subject before taking the picture. For a still subject, keep the shutter half-pressed until focus is confirmed, then press it fully.
For moving subjects, look for a continuous autofocus option in your camera's menu or manual. The Canon EOS Rebel T7 kit supports AI Servo AF, which is intended for tracking moving subjects.
If the camera focuses on the background instead, reposition the focus point or aim it at a clearer part of the subject. In dim light or with a subject that lacks contrast, autofocus may have trouble; try adding light or focusing on a nearby edge.
Manual focus can help when autofocus keeps choosing the wrong detail. Turn the lens's focus ring slowly and check the image through the viewfinder or screen.
What do aperture, shutter speed, and ISO do?
Aperture, shutter speed, and ISO work together to control exposure, or how bright a photo looks. Learn each one separately so you can see how it changes the image.
Aperture is the opening in the lens. It affects how much light reaches the sensor and how much of the scene appears in focus; our guide explains what aperture means on a camera.
Shutter speed is how long the camera records light. A faster speed can help freeze movement, while a slower speed can show motion and may make camera shake more visible; see what shutter speed does.
ISO controls how sensitive the camera is to light. Raising it can help in dim conditions, but it can also make an image look grainier; learn more in our guide to ISO on a camera.
Try one setting change at a time in a consistent scene. Take a photo, change the setting, and compare the results on the camera screen.
What is a simple way to practice exposure?
Photograph the same still subject with one setting changed between shots. This makes it easier to see the effect of aperture, shutter speed, or ISO.
If your camera offers Aperture Priority, use it to practice background blur. Shutter Priority can be useful for seeing how shutter speed changes the look of moving water or a passing person; consult the camera manual for the mode dial labels.
Which lens should you use first?
Start with the lens that came with your camera and learn how its zoom changes your framing. A kit zoom gives you a range of views without changing lenses.
On the Canon EOS Rebel T7 kit, the included EF-S 18-55mm lens is a standard zoom designed for Canon EOS cameras with APS-C sensors. Twist the zoom ring to make a subject appear closer or farther away in the frame.
A prime lens has one focal length and doesn't zoom. The Canon EF 50mm f/1.8 STM has a 50mm focal length and a maximum aperture of f/1.8; on an APS-C camera, its effective focal length is 80mm.
A fixed focal length means you'll move to change how much of the scene fits in the frame. Read what the numbers on a camera lens mean before choosing another lens.
What should you know about memory cards and photo storage?
Use a card type supported by your camera, and check the manual for card capacity and speed guidance. Insert and remove the card with the camera off to reduce the chance of a file or card problem.
The Canon EOS Rebel T7 is compatible with SD, SDHC, and SDXC cards. A card's capacity tells you how much it can store, while its speed can matter for burst shooting or video.
The SanDisk Extreme PRO 128GB SD Card is an SDXC card with a V30 video speed class and 128GB capacity. Confirm that your camera supports the card before using it.
Back up photos to a computer or another storage location before formatting a card. Formatting erases its contents, so don't do it until you've saved the images you want to keep.
How do you care for a DSLR camera and lens?
Keep the lens capped, store the camera dry, and remove loose dust gently. Follow the camera and lens manuals for cleaning instructions, and don't touch the sensor or force a cleaning tool into the camera.
Dust on the lens can affect image quality, but wiping grit across the glass may scratch it. Use a blower to move loose dust before wiping a lens with a clean cloth.
The Altura Photo Lens Cleaning Kit includes an air blower, brush, lens pen, lens cleaner spray, microfiber cloths, and lens tissue. Its spray is alcohol-free and ammonia-free.
Use the cleaning solution on a cloth rather than applying it directly to the lens, and follow the lens maker's care guidance. For a step-by-step routine, see how to clean a camera lens.
What should you practice after your first DSLR photos?
Practice focusing on a still subject, a moving subject, and a scene with a bright and dark area. These simple scenes help you learn framing, autofocus, and exposure without changing several things at once.
Review each photo at full size if your camera allows it. Check whether the subject is sharp and whether bright areas lose detail or shadows look too dark.
When you're comfortable with Auto or Program mode, try Aperture Priority or Shutter Priority. Keep notes about the settings you changed and what you noticed.
How do you use a DSLR camera with confidence?
To use a DSLR camera well, start with Auto mode, steady framing, and autofocus, then practice exposure controls one at a time. Use the kit lens until you know what view you want, and add a prime lens only if its fixed framing suits your photos.
Choose the Canon EOS Rebel T7 kit if you want an entry-level DSLR with a standard zoom lens, and use a compatible card to save your images. For camera selection, compare the best cameras for beginners and best DSLR options for beginners.
Frequently asked questions
What is the easiest way to use a DSLR camera?
Set the camera to Auto or Program mode, use autofocus, and look through the viewfinder or at the screen to frame your subject. Half-press the shutter to focus, then press it fully to take the photo.
Review the image and adjust one setting at a time as you learn.
What settings should a beginner use on a DSLR?
Start with Auto or Program mode and the camera's autofocus. When you want more control, try Aperture Priority for background blur or Shutter Priority for moving subjects, then let the camera choose the other exposure settings.
Check your camera manual for the mode names and controls.
Do you need a memory card to use a DSLR?
You usually need a compatible memory card to save photos in the camera. Check the camera manual for supported card types and capacities before buying one.
Insert the card with the camera off, and make sure it clicks into place without forcing it.
How do you focus a DSLR camera?
Set the lens or camera to autofocus if available, place the focus point over your subject, and half-press the shutter button. When focus is confirmed, press the button fully.
For manual focus, turn the focus ring while checking the viewfinder or screen.